Scanner Installation Guide for Windows
This video is also available with audio description.
Prior to beginning your scanner installation, you will need the following information.
- Cambridge Savings Bank’s RDC platform is accessed through the Business Online Banking platform. You will need to login to the platform to access Remote Deposit Capture
- Your Merchant ID and scanner model/scanner number
- NOTE: To install the software, you may need administrative privileges for installation purposes. Consult with your IT department for access. Follow the steps below to install your scanner:
Configuring Temporary Internet Files and History Settings – Internet Explorer Only
-
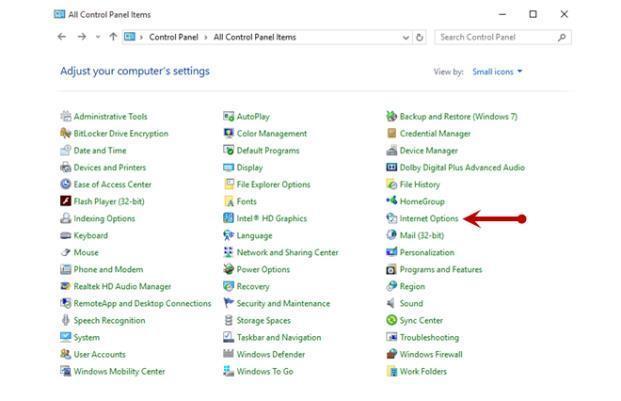
Open Control Panel from your Start menu.
-
Select Internet Options.
NOTE: You may need to select Network and Internet and then Internet Options.

-
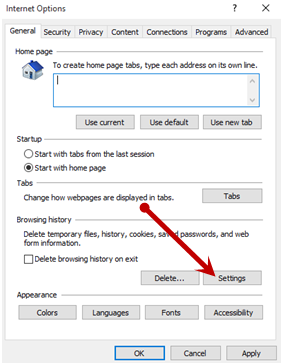
From the tabs at the top of the Internet Options window, select General, then click Settings under the Browsing history section, select the Settings option.
-
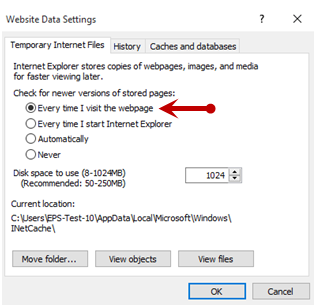
The Temporary Internet Files and History Settings window appears. Under Check for newer versions of stored pages, select the Every time I visit the webpage option.
-
Select OK at the bottom of the Temporary Internet Files and History Settings window and then select OK from the bottom of the Internet Options window.
INSTALLING DEVICE CONTROL
-
Navigate to Cambridge Savings Bank’s RDC application through Cambridge Savings Bank’s online banking.
-
On the Business Online Banking login page, enter your Company ID, User ID and password, and click the LOGIN button.

-
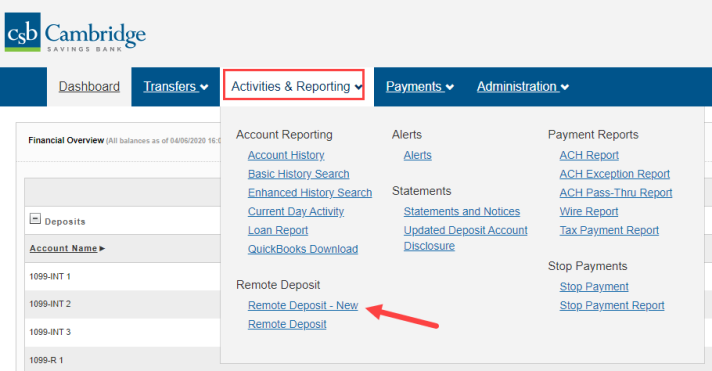
From the Dashboard homepage, click the Activities & Reporting tab and select Remote Deposit – New from the dropdown menu.
-
From the Remote Deposit – New page, click the Login to Remote Deposit – New button.

-
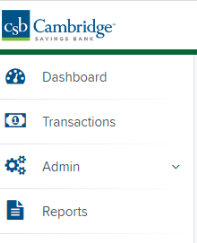
Click Login. Select Transactions from the left main menu.
-
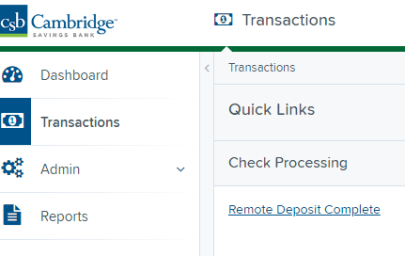
Under Check Processing, choose Remote Deposit Complete.
-
The Open Deposits page appears. Select Create New Deposit, as shown below.

-
The Device Control prompt appears. The Device Control prompt appears, informing you that Device Control is attempting to launch. Select Run to continue.
For Google Chrome users, click on the ProfitStarsDeviceCon….exe (as shown in the second image below).

-
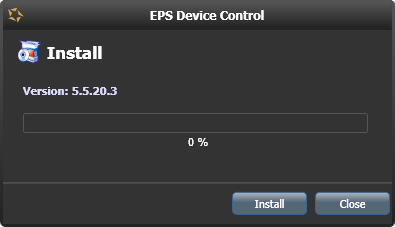
The system will prompt you to begin installing EPS Device Control. Click Install to continue. This may take several minutes.
-
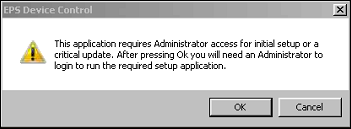
A prompt appears to ensure that a user with Administrator rights to the computer will proceed with the installation. Click OK to continue.
-
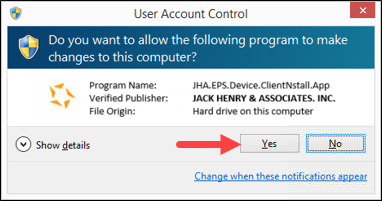
A prompt may appear for the application to make additional changes. Select Yes to continue.
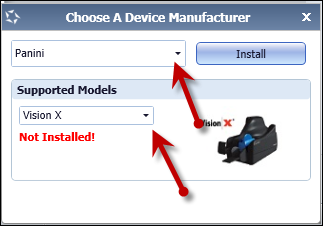
Choose the scanner and model you wish to install, and then select Install. Cambridge Savings Bank’s Panini Scanner models are:
-
I:Deal
-
Wl:Deal
-
Vision X
-
-
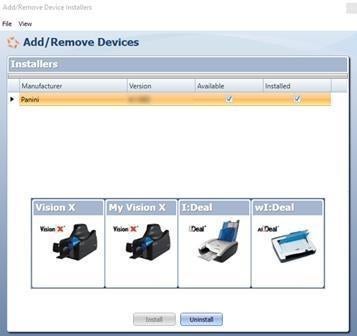
The Add/Remove Devices window appears. Choose the scanner you wish to add, and then click Install.
-
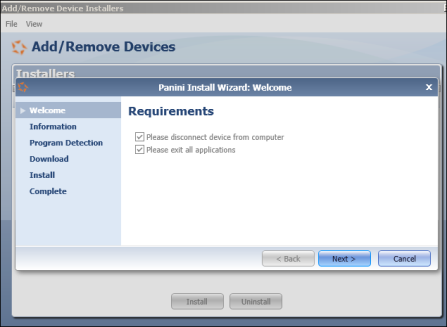
Disconnect the scanner’s USB or power cable from your computer, and exit all other applications. Click Next to continue.
-
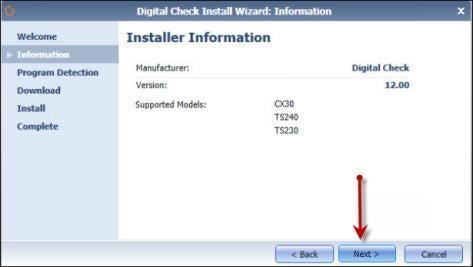
The Install Wizard displays the Installer Information prompt. Choose Next to continue.
-
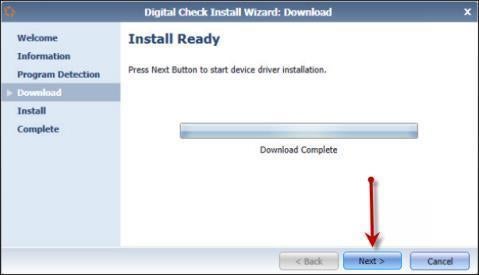
The Install Wizard displays the Install Ready prompt. Select Next to continue.
-
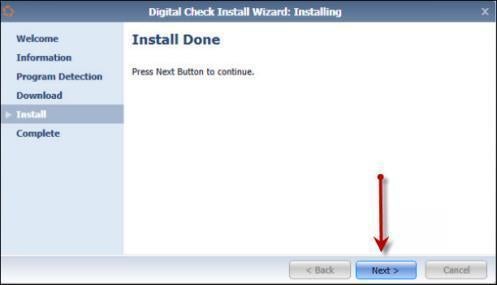
The Install Wizard displays the Install Done prompt. Click Next to continue.
-
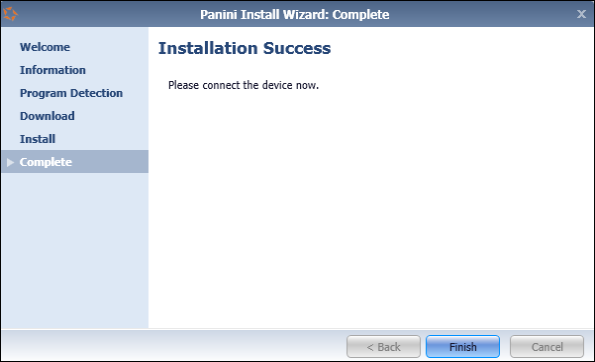
After the Install Wizard has completed, connect the scanner to your computer, and then click Finish. The scanner is now installed.
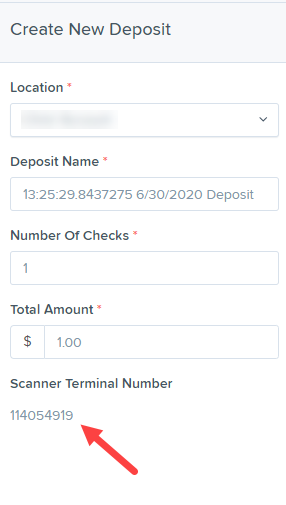
NOTE: When you begin making deposits, ensure that the Scanner Terminal # field is populated on the Create New Deposit page. When this field is populated, you are ready to begin scanning checks.
