Now & Then
This will show the main differences between our old RDC platform and the new RDC system, SmartPay Business.
-
OLD SYSTEM
-
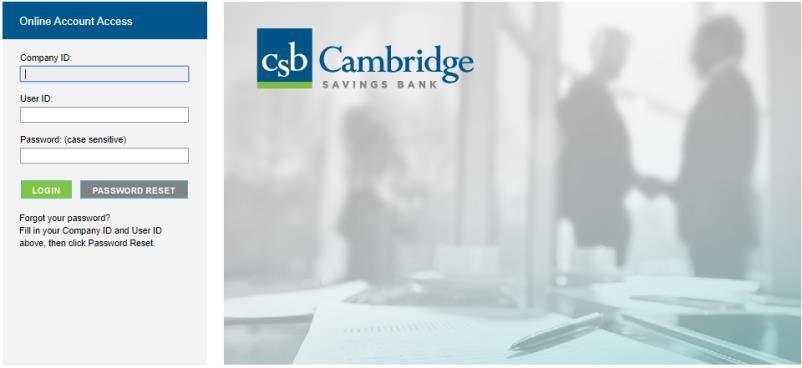
Enter your Company ID, User ID & Password
On the Business Online Banking login page, enter your Company ID, User ID and password, and click the LOGIN button.

-
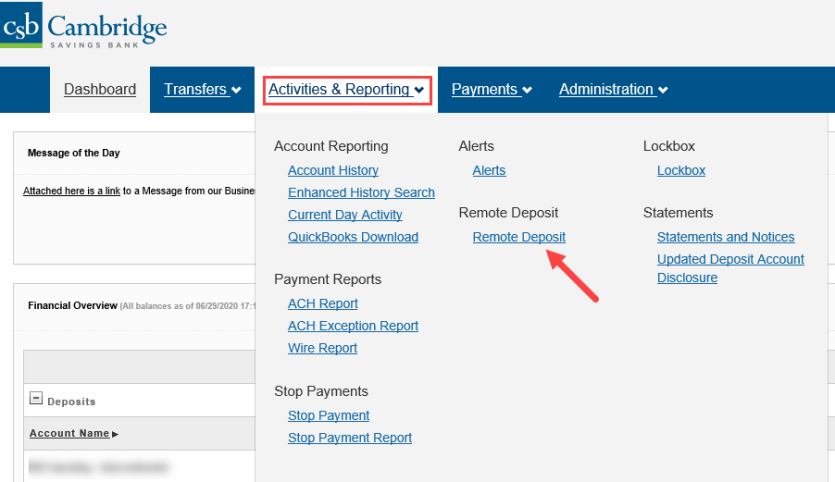
From the Dashboard homepage, click the Activities & Reporting tab and select Remote Deposit from the dropdown menu.
NEW SYSTEM
To access the new Remote Deposit Capture platform, simply follow the instructions outlined below.
-
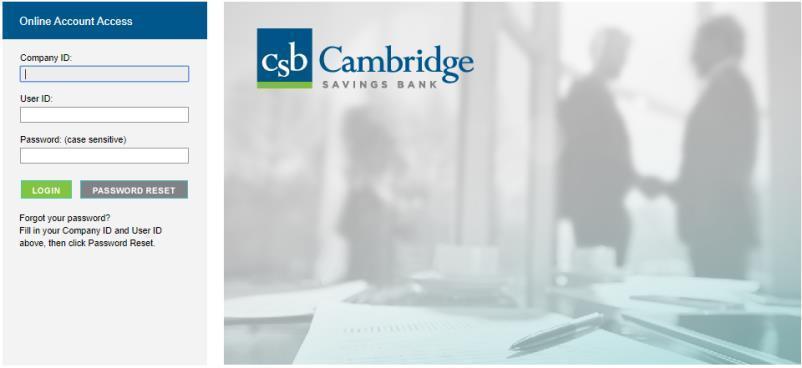
Enter your Company ID, User ID & Password
On the Business Online Banking login page, enter your Company ID, User ID and password, and click the LOGIN button.
-
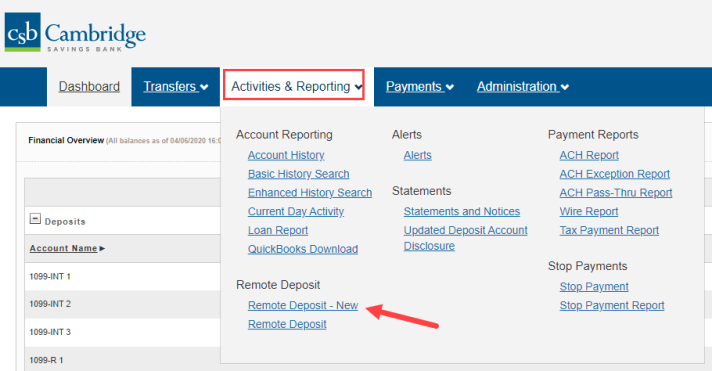
From the Dashboard homepage, click the Activities & Reporting tab and select Remote Deposit – New from the dropdown menu.
-
From the Remote Deposit – New page, click the Login to Remote Deposit – New button.
-
-
OLD SYSTEM
-
Log into Business Online Banking, navigate to the Activities & Reporting tab and select Remote Deposit from the dropdown menu. Click the Login to Remote Deposit button.
-
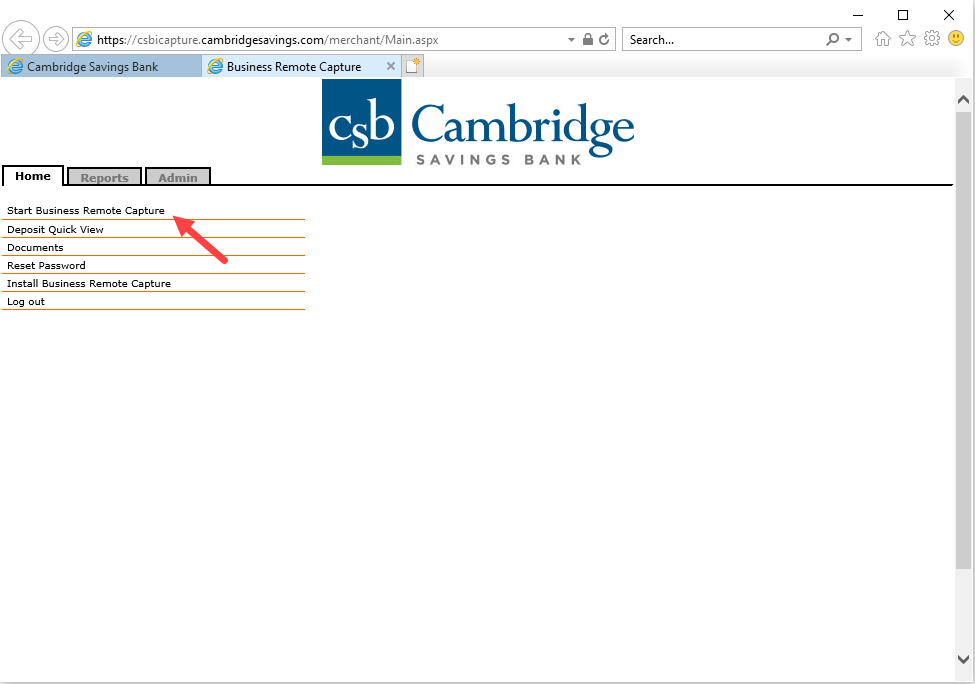
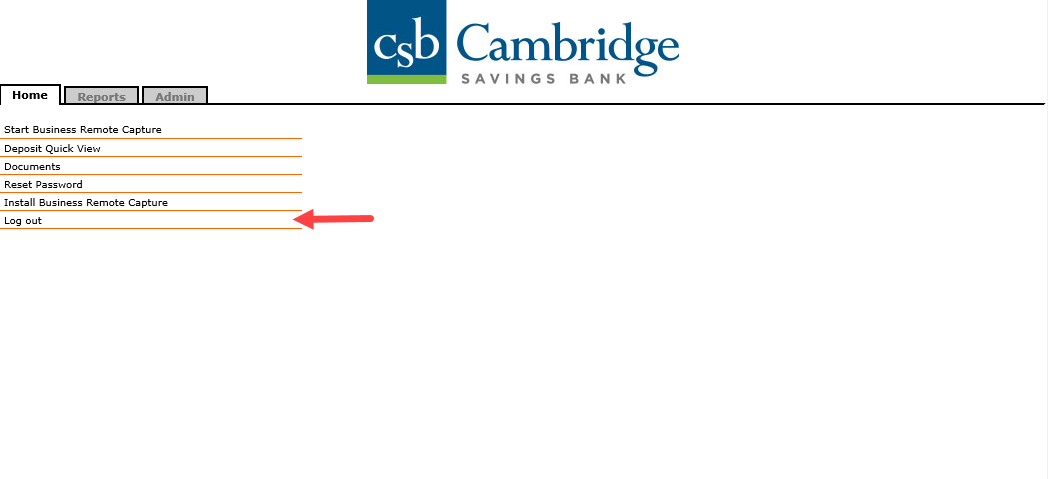
On Home page, select Start Business Remote Capture
NEW SYSTEM
-
Login into Business Online Banking, navigate to the Activities & Reporting tab and select Remote Deposit – New from the dropdown menu. Click the Login to Remote Deposit – New button.
-
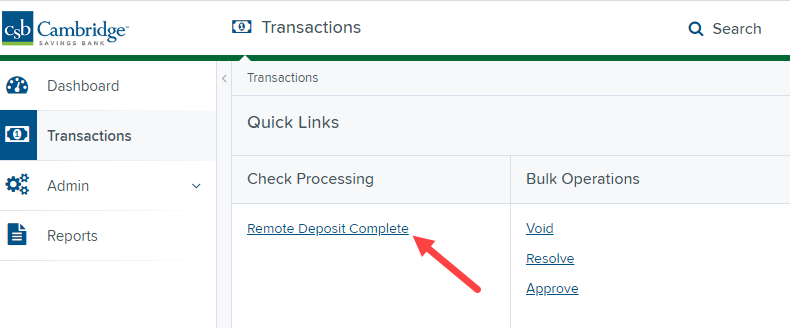
From the Remote Deposit Dashboard, click Transactions on the left side of the page.
-
Under Check Processing, select Remote Deposit Complete.
-
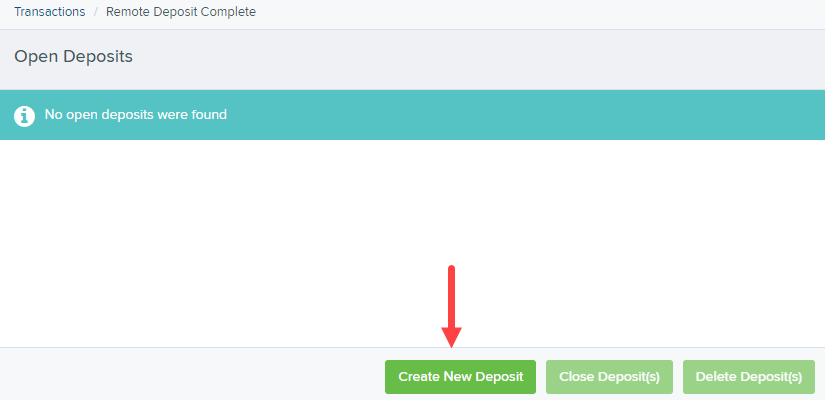
The Open Deposits page appears. Select Create New Deposit.
-
-
OLD SYSTEM
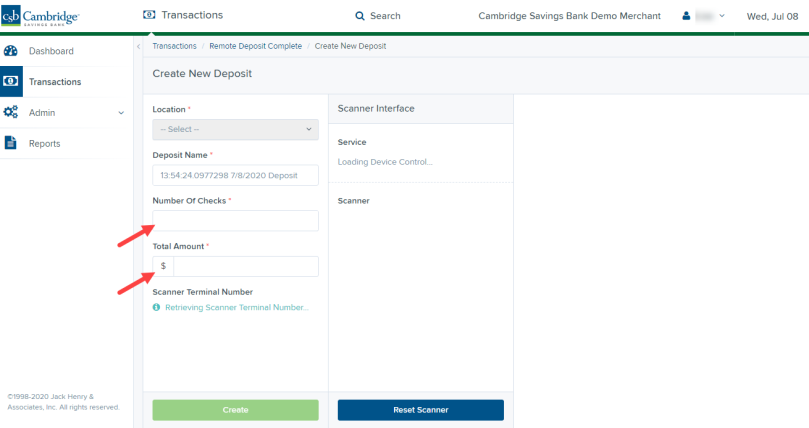
Does not require the total number of checks to be entered
NEW SYSTEM
You will need to enter both the Number of Checks and Total Amount of the deposit in order to initiate the deposit.
-
OLD SYSTEM
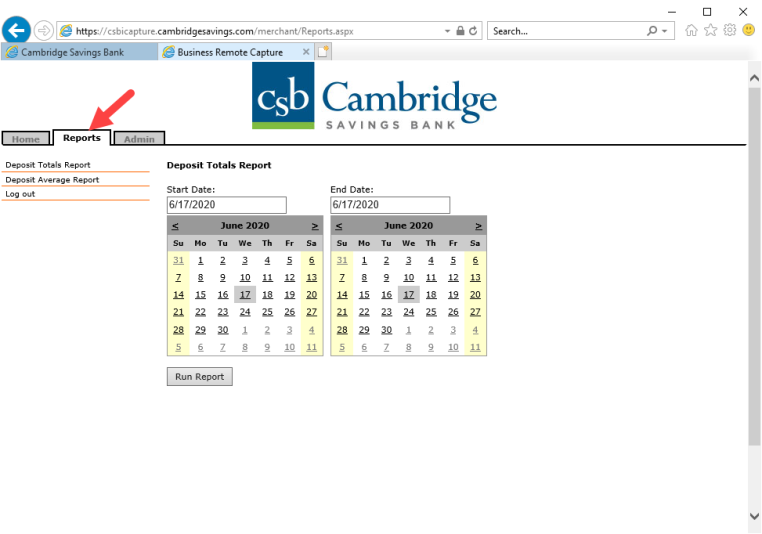
Select the Reports tab to retrieve the Deposit Totals and Deposit Average reports.
NEW SYSTEM
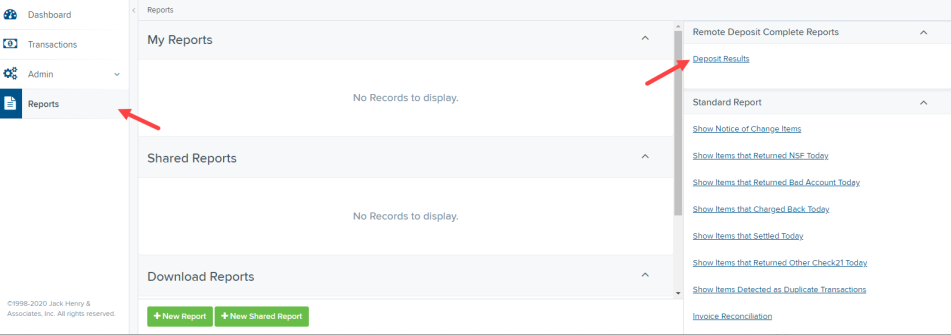
To review the status of your deposit, select the Reports from the left main menu. Select the Deposit Results link on the right.

-
OLD SYSTEM
NEW SYSTEM
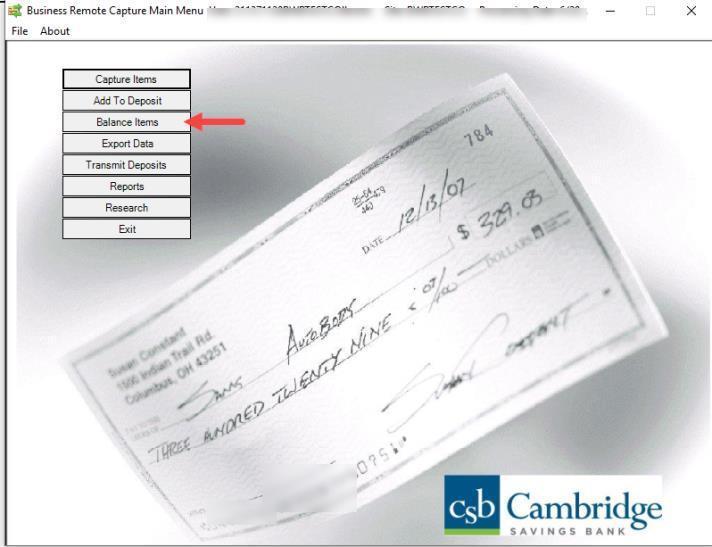
In the new system, you will not need to balance your batch in order to submit it for processing.
-
OLD SYSTEM
-
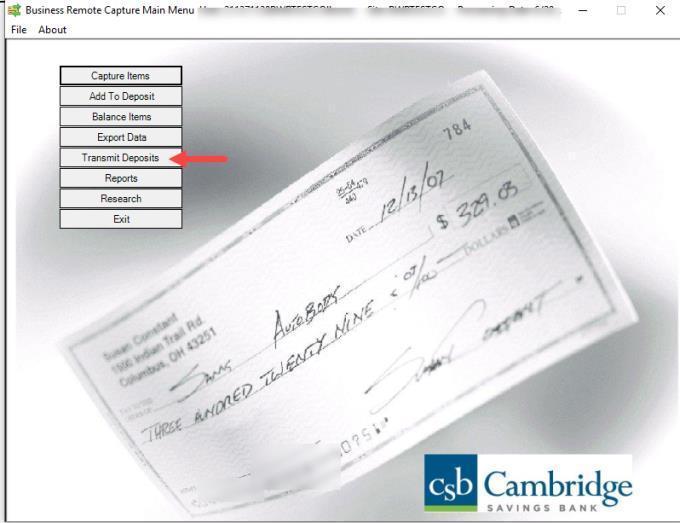
Select Transmit Deposits
-
Select the deposit you would like to transmit to CSB for processing. Then click Transmit.
NEW SYSTEM
-
On the Open Deposits page, select the checkbox in the Open column next to the deposit you wish to close.
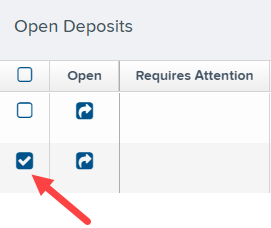
Select Close Deposit(s) from the bottom of the page.

-
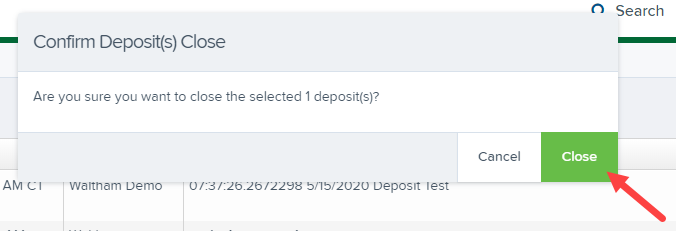
Select Close on the Confirm Deposit(s) Close confirmation screen. The system will ask you to confirm closing your selected deposit(s). The deposit will be sent to CSB for processing.
-
-
OLD SYSTEM
NEW SYSTEM


-
OLD SYSTEM
Remote Deposit Capture deposits display as “Remote Deposit Capture” in your transaction history in business online banking and deposit statements.
Your mobile deposits display as Business Mobile deposits.
NEW SYSTEM
Remote Deposit Capture deposits display as “Remote Deposit” in your transaction history in business online banking and deposit statements.
Your mobile deposits (if you are using the mobile app to deposit checks) will also display as “Remote Deposit”.
Deposits regardless if they were deposited through the the RDC business mobile banking app or the SmartPay Business application using the desktop scanner will be displayed with the label “Remote Deposit”. To determine what deposit transaction amount belongs to each channel access your deposit history in your business mobile banking app and in the SmartPay Business system.
-
TO REVIEW YOUR BUSINESS MOBILE DEPOSIT HISTORY
-
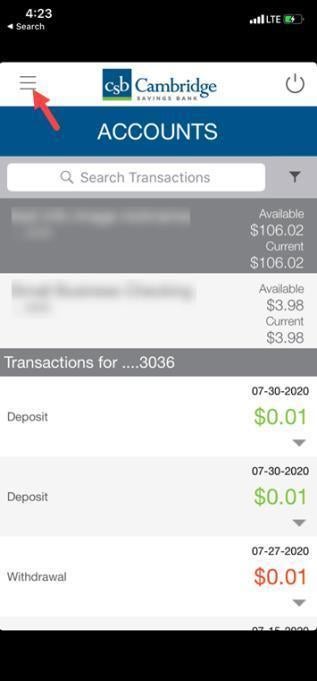
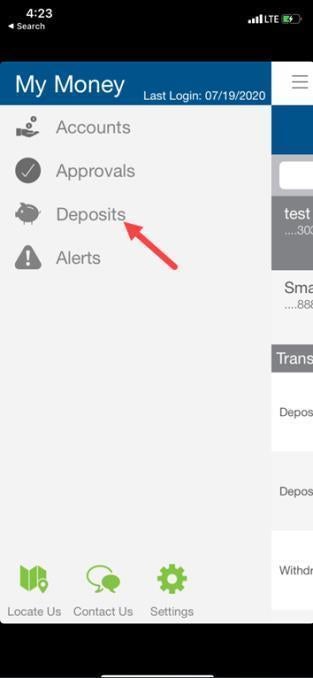
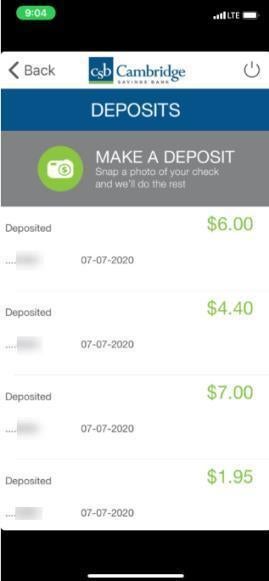
Log in to the Business Mobile Banking app, click on the menu icon and choose Deposits from the list of options.
-
On the Deposits screen you will be able to view your recent mobile deposit capture deposit history including the date of the deposit and amount.
TO REVIEW YOUR DESKTOP DEPOSIT HISTORY
-
Log in to Business Online Banking, navigate to the Activities & Reporting tab and select Remote Deposit – New from the dropdown menu. Click the Login to Remote Deposit – New button.
-
Select the Reports from the left main menu. Select the Deposit Results link on the right.
-
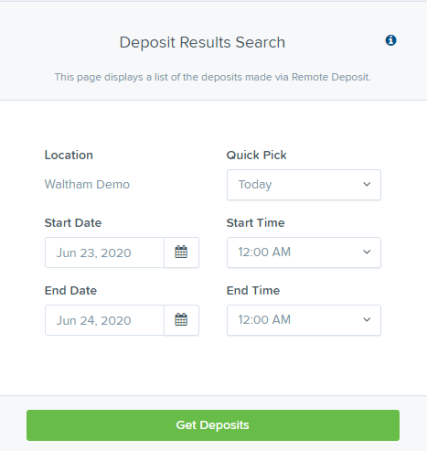
Select the location for which the deposit was created, and then choose the date range. The start date should be the date the batch was created.
-
Click icon under "Item Details" to view individual items in the deposit.
Click icon under "Deposit Details" to see the event history from the batch, including deposits rejected upfront.

-
